Ways to Have Your Own Website
If you want to put something on the web, you have many options. There are a lot of services that offer free or cheap ways to get online. Weebly and Wix are all-in-one package for creating your own site. Blogger and WordPress are both free and easy to use if you’re more of a journally, opinionated, writer type of person. Some businesses default to just using Facebook for building a web presence and connecting with people online. As a Google Apps member, you also have Google Sites as an option for putting together a website you can call your own. Just login with your gbstu.org email, and you’re off and running.
How Things are Put Together
Having a vision is great, but to start building web pages, you need some background information about the coding languages used on the web. Once you understand some of the basics, we will be using a time-honored web development tradition to create beautiful, personalized websites – we’re gonna steal other people’s stuff.
Practice Makes Perfect
Before we start ripping off other people’s hard work, you need to know how to edit and manage the files you rob. After you’ve finished the web building equivalent of putting your name on other peoples’ papers, come back and continue learning how to build a website.
Strike Out On Your Own
Necessary Template Sections
When thinking about adding your content (the words and pictures you put on your site) you want to start with a clean and empty space that still contains the formatting elements you want. Remember the basic parts of a website:
- a header at the top of the page. This is where your site’s name will be.
- a navigation (often called navbar) with links to each of your page within the site.
- a body (sometimes called main) that contains the information and pictures of the topic the page is about.
- a sidebar for external links to other websites.
- a footer at the bottom of the page with general information about the pages author and publishing date.
It is essential that you consider each of those sections when you pick a theme. Some oswd themes have way too much extra material and deleting it all makes the page hard to work with. Here’s a description of a good, easy to work with theme, and two that present more challenges.
- OSWD – Red-business – Too Much Stuff!
- OSWD – Nautica – Too Much Stuff!
- OSWD – Naturalist – A Great Layout
- OSWD – Terra Firma – Another Great Layout
oswd.org is a great site with simple designs and a single index.html file to start with. The templates are dated, but they provide a good foundation for tackling bigger web development projects.
Understanding file management is part of the web development process. Most templates will download as a .zip file. Remember, zipped files (a.k.a. archived files, a.k.a. compressed files) are not usable. The files and folders in the zipped file need to be removed/extracted/decompressed in order for you to use them. Here are 4 videos showing how the process works on a Chromebook.
Step 1: Downloading an oswd.org Template
Step 2: Creating and Naming a Folder for Your Site
Step 3: Copying and Pasting the Index and Other Files
Step 4: Creating the Images Folder and Copying and Pasting the Images to it
The goal of this process is to have a folder in the files section of your Chromebook, named correctly, that contains the index.html, .css file (names for .css files vary from one template to the next. Standard convention is to name it style.css), and whatever images are included on the template. Open the index.html file and the .css file in the Text app on your Chromebook.
Saving Your Template Correctly
In order to begin your website, you need to have a web folder to put it in. Go to your F: drive and create a new folder. Name the folder using the following format: s1 or s2 indicating the semester followed by the year-yourname-sitetopic. The name of the folder should be something like s12015-amber-top-video-games or s22018-adam-bass-fishing.
Next, you have to find the site template you want to use and put the pieces of the site that you are going to use in the folder you just created.
Opening the code
Next, open Notepad++, go to File>Open, and then find your web folder (s22018-yourname-sitetopic). Open the index.html file, and then the .css file. These files are often named “style” or “main” Sometimes they are stored in separate folders.
Editing Your Template
There are 3 main areas you will edit to make the index page perfect:
- Site Information (usually the content within the <head></head> tags and the <footer></footer> tags) This includes, but is not limited to, the title, description, keywords, publishing information and dates.
- Content (found within the <body></body> tags) this includes the information you are giving your readers, as well as links within your site and external links.
- Images – this includes adding, deleting and changing images
Site Information – Head
Here’s a sample <head> that contains some of the information you’re going to want to add or change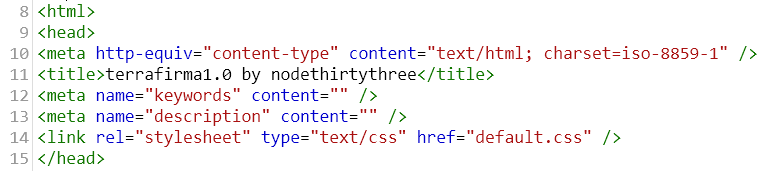
Start at whatever line the title is on. For the example above, it’s line 11. Change the title to something more appropriate for your site.
The next 2 areas where you will make some edits are on the line with the keywords and the description. Keywords and description provide information for Google. They tell google what the site is about with individual words, and with a sentence. The sentence you write for the site description is the one Google will list under your site name in Google Search results. Come up with at lease 4 keywords you want associated with your website. Next, write a sentence that describes your site.
Your completed head section should look something like this

Site Information – Footer
Once you’ve perfected the head section of your website, turn your attention to the footer.
Footers will vary from template to template, but expect that there will be words like “rights reserved”, “published by”, “designed by” etc. There may be dates as well. Your job is to change whatever information is there so that it reflects you as the web developer/designer and any dates are for today. Mine started like this:

and I changed it to this

Header
You’ve spent some time within the <head></head> tags making sure your site’s information is solid on the code side. Now it’s time to make the preview of your site fit what your site is about in the header. Remember, the header section of the visual or preview version of your site is where the title (and sometimes slogan) of the site are displayed. When you edited the Refresh website, the title of the site was “refresh” and the slogan was “put your slogan here”. Your template should have a similar place for your page title.
There may also be a place for an image at the top of your page. If so, choose an image that fits the theme of your site.
Body
The next place to focus is on the body of the page. This is where yo introduce your page.
Previewing changes
It’s easy to see how your code edits effect your site. Simply go to Run>Launch in Chrome while in Notepad++. Be sure to save and preview your changes frequently. This way, if you make a mistake, it’s easier to go back and correct it.
Choosing Content
You need to create a site with 5 pages. An index page (aka home page) and 4 pages about your topic. You could do a sports site and have pages devoted to 1)football, 2)soccer, 3)basketball and 4)lacrosse. You could have a Minecraft site with pages about 1)blocks, 2)monsters, 3)tools, and 4)animals. The point is that you will have an index page as an introduction page, and then 4 pages with content. Use these guidelines when writing for your website.
Tweaking Your Design
In general, you want to tweak small pieces, a little bit at a time. Change the color of a heading, replace a small image with one that fits your content better. replace an existing paragraph by copying and pasting some of your own writing. These kinds of changes are fairly doable for most beginners.
Don’t open up the code and erase huge parts of your site. Don’t try to drastically change the layout of the page. Simple, small changes work best.
Pay attention to nested <div> tags. usually when a design gets destroyed, it’s because of a neglected <div> tag. Handle them with care.
Website Requirements
To summarize, your final assessment will be based on
- Perfect folder and file structure
- Folder name format: s12016-name-topic
- No spaces or capital letter in the names of folders, html files or pictures
- 5 pages that you created linked together with a navbar
- One of the 5 pages named index.html (your home page)
- 4 external links that lead to other webpages
- Unique information on each page
- Images on each page
- All images stored locally
- All extra placeholder information and links deleted (no “lorum ipsom delor”)
Further Web Design Reading
The coolest and most functional websites on the planet all start with a vision.
Web designers spend a lot of time on the internet developing opinions about what looks good. As a designer, you should start book-marking sites you like the look of. Also, keep track of colors you like, or batches of colors you think go well together. Paying attention to layout and color schemes will help you become a better designer. Here are a couple good design sites to browse for tips on how to be a top notch web designer.
Six Revisions
and for examples of what not to do – Web Pages that Stink